
Pelvic Balance for Riders is a two-part series addressing how to find the optimal pelvic alignment for riding, and how to strengthen and mobilize to keep that posture in the saddle.

Aside from containing some very sensitive structures that need to be protected, our pelvis is also the control centre from which we influence the horse. It forms the surface through which the rider’s weight contacts the saddle and is our centre of balance.
The pelvis: Your control centre
Aside from containing some very sensitive structures that need to be protected, our pelvis is also the control centre from which we influence the horse. It forms the surface through which the rider’s weight contacts the saddle and is our centre of balance. The pelvis also connects with some of the largest muscles in the body, making it a huge source of power and strength.
A lot of us aren’t naturally tuned in to our pelvic alignment throughout our daily lives. Getting more familiar with yours will unlock some big improvements in the saddle that both you and your horse will appreciate!
Anatomy time!
Your pelvis is made up of several bones: your sacrum at the back, your two seat bones (the “ishia”) on the bottom and the large “hip” bones (the “illia”) that wrap around each side. It is shaped a bit like a bowl. Think about that bowl as you are sitting right now. If you filled your pelvic bowl with soup, would any spill out? Which way would it spill?

In the therapy and rehab world, we use the terms anterior (towards the front) pelvic tilt, and posterior (toward the back) pelvic tilt. Anterior pelvic tilt means that you would spill your pelvic soup out the front, while posterior pelvic tilt means you would spill it out the back. You could also spill your soup out left or right.
Find your pelvic neutral!
If you are sitting in a chair right now, experiment to find both extremes. First, try to sit up straight with your weight evenly balanced left to right; see if you can feel your seat bones contacting the chair. Roll to the back of your seat bones, really rounding out your lower back and collapsing your belly backwards; this is an exaggerated posterior pelvic tilt, and your soup is spilling out the back of your pelvic bowl.

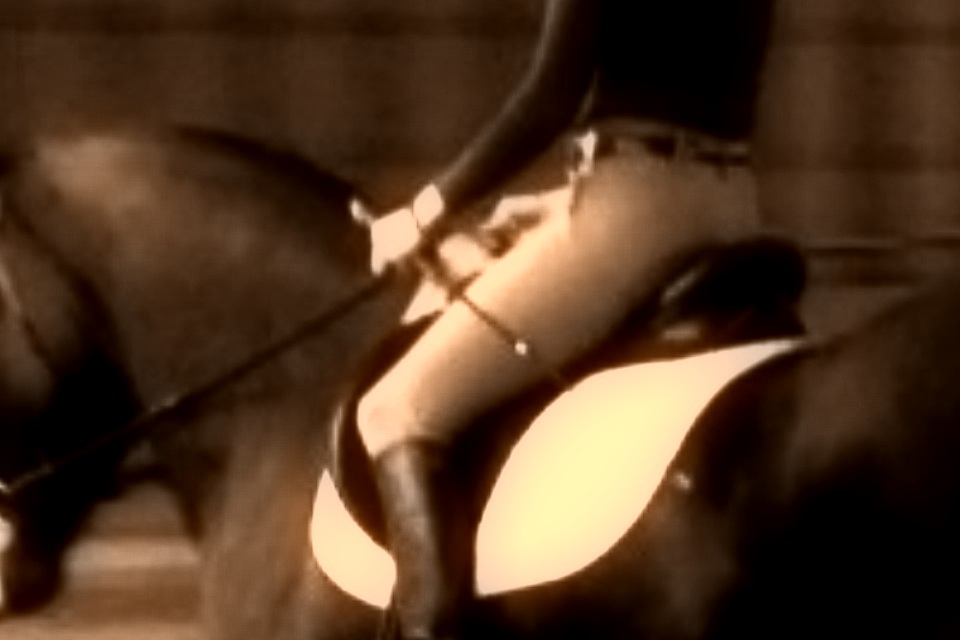
In posterior pelvic tilt (above), rider’s back tends to round and the rider can end up behind the horse’s motion
Now do the opposite: roll to the front of your seat bones, hollow your back and stick your tummy forward; this is an exaggerated anteriorpelvic tilt, and your soup is now spilling out the front.

In anterior pelvic tilt (above), the rider’s back tends to hollow and can result in a “fork seat”
Roll back and forth a few times until you reach a happy medium: this should be close to the neutral pelvic alignment you want while riding. You should feel your weight on the middle of both seat bones, and your low back will have just a slight natural hollow. How does this compare to your natural position in the saddle?

Neutral pelvic alignment shown in a three point seat
If you are having trouble getting a clear feeling of which way your pelvis is tilting, try this simple exercise:
Begin lying down on your back on a comfortable surface like a rug or yoga mat, with your knees bent and your feet flat on the floor hip-width apart.

Place one hand on your belly, and the other palm-down on the floor beneath your low back where the natural arch is. If you have a lot of natural anterior tilt, you may feel a space between your back and the floor here already. From here, begin to roll your pelvis between the two extremes, and see if you can feel the change in the shape of your back as you do:
Posterior pelvic tilt: Push and flatten your low back down into your bottom hand until you feel a strong pressure. Drop your belly button toward your spine and tighten your tummy muscles. Begin to feel as though your tailbone is starting to curl right up off the floor.
Anterior pelvic tilt: Arch your low back up and away from your bottom hand, allowing the belly to rise. You should feel more pressure into your tailbone and shoulders as your low back comes away from the floor.
Roll very slowly between these two extremes, noticing what each feels like. Also notice that as you do this, the position of your head, shoulders, hips and feet do not change relative to the floor – the only thing changing is the angle of your pelvis. Come to rest at the midpoint where your back is almost flat on the floor and your tummy muscles just start to engage. This is your pelvic neutral.
Once you have the feeling of changing the angle of your pelvis on the floor and in a chair, it’s time to take it into the saddle. While your horse is standing still, roll forwards and backwards until you find neutral. Take note of whether this neutral position differs from your norm. Does it change when you go from halt to walk, walk to trot, or trot to canter? Have your coach or a friend lunge you so you can place your hands on your low back and belly to confirm what you are feeling while the horse is in motion.
The next part of this two-part series addresses the major muscle groups of the pelvis and how to use them to maintain optimal pelvic alignment as you ride. Stay tuned and happy riding!
-Steph